Saturday, August 30, 2008

Thom did it

"I can do it," I offered. He replied, "No, I want some blog love. All I ever see is, 'Oh, Susie!' 'Susie is so wonderful, Susie is so amazing.' Where's my blog love?" So, Thom, here it is: your blog love. 

Thom worked on the last bit of the countertop adjustment today as I was finishing painting the trim in the kitchen. He worked that puppy good too -- he sanded the little bit of a lip that we had on the butt joint above and now it's bootiful! Way to go, dude!

We also just finished putting on the first coat of the Behandla wood treatment oil on the countertop. You can see what it looks like before above and below with a coat of oil on it. It's just gorgeous and really soaks up that oil. We'll have to put a couple more coats on yet today and then let it dry but it will look really nice, I'm sure.
As I said (and you can see above and below) I also finished painting the trim and doors in the kitchen too. I took a bit of a hiatus yesterday to help with move-in at school. All of the first-year students' enthusiasm made me a bit nostalgic, remembering good times and what seemed to be much simpler times too. With this in mind - as well as my exhaustion - I've decided to put off the floor for a week or two. While I'm itching to have it all done and get out of this chaotic mess, I fear my energy and my patience has temporarily run dry. Besides, it will give us a chance to re-group and figure out what the heck we need to do to put this floor down. Anyone else done one of these floating floors? Tips? 
However, all is not lost to exhaustion. I'm going to run to Lowe's and get the cabinet hardware today and perhaps I'll put the drawers and doors back on tomorrow. The idea to replace the drawer slides is a bust, though. All of our drawer boxes are open (i.e., no sides of the cabinet box) so there is no support for us to put in the new fangled ones I wanted. Oh well. I also need to work on getting the crown molding back up and get a few new pieces made. Onward!

Thursday, August 28, 2008

Inching toward completion

I got the second coat of the paint up today (it's Silvermist by Sherwin-Williams, just in case you were curious) so I don't really have any new pictures to show - it pretty much looks the same but just better close up. I also just put the first coat of the alkyd paint on the cabinet boxes - I'm hoping to get the second coat on in a couple hours so all of the painting will be technically done today. I'm sure there will be a bit of touching up here and there, especially after we put in the new range hood, but for all intents and purposes, the painting will be done. 

So what does that mean? That means we might be able to do the floor this weekend. I opened up a box of it last night to find, however, that there were no directions included. I don't know if just that box is missing the instructions but I found some online at the Lumber Liquidators' site that I think should work equally well. It looks like the biggest concern will be making sure the floor is level - this freaks me out a bit as it's certainly not level and I'm not terribly excited about the prospect of putting some kind of leveling compound over the vinyl and waiting for it to dry. Yuck.

Beyond that, nothing profound to share today. I spent the day listening to '80's music on the cable television station. I realize this dates me, but these were definitely the anthems of my youth. Sadly, though, I see a lot of issues that may have subconsciously infected my psyche over the years from this music. For instance, there are a lot of songs about men stalking women who don't seem to be interested in them (e.g., maybe Jesse's girl isn't interested in you, then what, Rick?). Also, a lot of music about "bad boys," "nasty boys," and so on and so forth (although I have to wonder what Gloria Estefan's definition of a bad boy is in relation to Janet Jackson's). What did I learn about male-female relations from these songs? Probably nothing good.

Wednesday, August 27, 2008

Kitchen as Life

Graduate school ruined me forever. Like many others, I found that I became much more analytical after passing through the socialization process of graduate school, so much so that I really have a difficult time enjoying the simple things in life any longer. I have a difficult time watching television, for example, without over-analyzing everything that passes before my eyes -- don't believe me, just ask my husband. What I used to look at casually and with humor I now closely scrutinize to the point of disdain. What does this have to do with my kitchen? Let me explain.

I have the first coat of paint on the kitchen walls. As the photo above demonstrates, it looks very nice. Yes, very nice -- that is, until you look closely. Then you see all of my errors and boo-boos. There's that spot of joint compound that was sanded well and there's a corner that isn't quite smooth. 

The moral of the story? Life is enjoyed much more when one doesn't look too closely -- and the same goes for my kitchen.

I'll get the second coat on tomorrow and then start painting the cabinet boxes, and after that, I'll paint the woodwork. We definitely need a backsplash to break up some of the monotony of color but we haven't yet decided on what this will be. I'm leaning toward slate tiles but we'll see when it's all said and done.

Tuesday, August 26, 2008

Primed and ready

I spent another day priming - the second coat on the woodwork and on the walls. You may say, "But, Susie, you did a pretty cruddy job. I can still see some of the yellow." If you'll recall, however, I primed all of the kitchen back in February before we moved in, so I just spot primed where we had skim coated and/or done some patching. So, the plan is to start putting the real paint on the walls before going any further. While I got the countertop all on today and everything lined up pretty well, I decided to wait to seal it after the painting is done. That means I'll probably do one coat tomorrow, one on Thursday or Friday, and then paint the two coats on the cabinet boxes. This means that we may or may not get to the floor this weekend as planned. Honestly, I'm just exhausted and I need to go back to work a bit this week. 

I also wanted to update from last night - Thom got home and we did the honors of turning the water back on only to find it spraying all over the bottom of the cabinet. Oopie. Thom fixed that and then we found water leaking out the side of the garbage disposal flange. Double oopie. So we fixed that. Ah, home improvement - there's nothing like fumbling around and learning as you go. No casualties, however - and that's always nice.

Monday, August 25, 2008

Oi

Man, I'm wiped. Thom's back to school this week (while I still have one more week yet to go) so I got up when he did and started in on the kitchen. The first thing I actually did was clean up the sty that has become our house. I think living with the chaos of the kitchen has started to spill over into the rest of the house, as in: "Why dust? It will just get dusty again from the construction" or "Why clean the floors? We'll just track more junk on it from the kitchen." Well, enough's enough already so I picked up at least a little.

Then I worked on two projects that took way more time than I thought they should have, and pretty much, when all is said done, both sucked equally much. I have decided that I dislike painting wainscoting as much as I dislike putting in garbage disposals. Well, regardless of the odiousness of these two tasks, they got done.  You can see my plumbing handiwork below (someone wanted to see our dual shut-off valves - also in the photo). I used a HD trick (the book is very helpful, by the way) of stacking a bunch of big books under the disposal to prop it up while I made the connections and got it screwed back on the flange. I guess it made it easier but it still blew.
The wainscoting is now primed with the first coat but may need another coat. I'm not sure if I ever shared this or not but when the big kitchen remodel was done circa 1970ish, they decided to paint all the woodwork in there to look like wood. It's so silly. There is beautiful woodwork that looks to have been stained in its earliest iteration (I saw it when I removed the baseboards) but they must have thought it was too light so instead of re-staining it, they used a faux-wood brush and painted it dark brown. It's just hideous but I suppose it went fabulously well with the harvest gold motif. So, yes, it may need another coat of primer before it's painted.
The second coat of primer is also now on the cabinet boxes so they should be ready for the real paint - maybe tomorrow if I can still use my hands. I'm hoping we get the last piece of countertop on tonight and then I can also sand and seal the countertops so we can start using them!

Sunday, August 24, 2008

For cryin' out loud - it's ALMOST done

It is now midnight on Sunday evening. Thom and I have been working since about 9:30am. I had really hoped we would have all of the countertop in by this evening but we're just 20 inches of shy of finishing the #*@&)! thing. It's been one of those days that you realize you did a helluva lot of work but you don't really have a ton to show for it. You think to yourself, "I know I'm exhausted. I know I worked all damn day. Why isn't it done?"

It started out okay. We had cut the small piece of countertop over the lazy Susan yesterday but were a bit confounded on how to affix it without access through the cabinet. We decided to screw on a couple of 2x3s to the walls to act as braces and then since the range is flush with the edge of the cabinet, to use the brackets that Ikea provided on the outside. It's a bit ghetto but it's on there and it's not going anywhere, dammit, and if anyone looks at it and says, "Hey, why are those there?" they will be summarily booted from our home. I'm just warning you, okay.

We also spent about 2 hours making the drywall patch by the door (you know, that place where the MENSA member had cut out the plaster?) before trying to affix the countertop over there. I think it was right around that time that we heard a "POP!" and then I saw a spark and a little poof of smoke come out of the light switch by the door. I went downstairs to see that the breaker had tripped. We were just so near tears at that point, shaking our fists at the heavens, and screaming, "WHY!?!?!?" God chose not to answer.

I think at that point we got into a huge argument and almost threw in the towel for the day. After a short time out for both of us, we rallied. I think at this point we might have gotten something to eat and that seemed to greatly improve my outlook on life and my outlook on my marriage. While going to get some take out we stopped at the hardware store and got a new 3-way switch (that was the one that popped). I had read on the Internet that these are often caused by loose connections. We weren't sure if this is what it was or if we had wired something wrong weeks ago (groan) but this seemed implausible if it's worked fine for all of this time. After eating I re-stripped the wires, reattached them to the switch, and hoorah - all works fine. It was just a loose connection after all. Crisis averted.

In the MEANTIME (sheesh), we got the long piece of countertop cut and then started on the sink cut out. I think this is where most of the day went, to be honest. Cut after cut after cut, inching away at the lines and getting it to fit just-so. Thom gets all the credit for this one, man. He was so patient with that stupid jigsaw, he deserves a big ol' pat on the back. Three cheers for my husband! Hip, hip, hooray! If nothing else was accomplished this weekend, Thom has become Power Tool Extraordinaire. He rawks.

So, after many hours, we got the cut correct. I put the plumber's putty around the lip (and then pondered how to get it off my hands for about 20 minutes - thank goodness for vegetable oil) and then I spent another 90 minutes trying to get those stupid little brackets back around the edge of the sink. I think this is what probably got me closest to the edge of insanity. We then got the new faucet on (it's purty!), put on the handy old FIXA diffusion barrier over the dishwasher, and then screwed that piece of !#@!& onto the cabinet. 

We ran out of steam but know we can finish the last 20 inches tomorrow. Then we'll have to put the BEHANDLA sealer on it. Hopefully I can then finish priming the cabinets and then get them painted this week. I'll then get the doors and drawers back on and then we're almost done. That's right: only the painting, trim, new hardware, new vent hood, and new floor to go. Oi.

Here you are, photos for your viewing pleasure:

What it looks like now
New faucet and the last little stinking piece left on the far end
The drywall patch and the offending light switch

Saturday, August 23, 2008

One down - three to go (plus our sanity)


Well, as Thom predicted (don't tell him I said he was right, it would totally ruin the dynamics of our relationship), things took much longer than expected today. After I woke him up, we pondered the removal of the garbage disposal from the sink and then the pipes from the faucet. We took a quick trip to HD, and to our delight, found someone wonderfully helpful there who told us how to remove the disposal and suggested that we cut the pipes and use a new compression fitting with a shutoff valve instead of having to deal with soldering and all that crap. This was a good idea, in theory. We got home and saw the above, and realized there was really no room for us to cut the pipes below the old shut-off valves. So, while we pondered this new obstacle we decided to take off the old countertop - as you can see below.


We drove back to HD to ask about this (and take the aforementioned photo with us) and to buy a circular saw to cut the new countertop. HD dude was still there (and still really helpful) and told us not to worry - it was okay to have two shut-off valves. We have been really conscientious doing this whole thing so we would never make a future owner of the Bangor Foursquare say the same words we have had to say over and over again: "What the hell did they do this for?" But we realized this was a moment where we would have to go back on our vow. 

So we started cutting the pipes with that handy little pipe cutter and then found we couldn't get the compression fitting to go on all the way. As Scooby would say, "Ruh roh." While we pondered this new obstacle, we started cutting the first piece of countertop with Thom's new circular saw (after saying a prayer and crossing myself several times, I left the room to allow Thom to do the actual cutting). Here's what the first piece looks like - pretty schnazzy, eh?

Obviously you need to ignore the gaping hole in the back and the once primed cabinets without doors or drawers but you get the general effect.

After that, I checked out the compression fitting issue and realized we had turned the pipe cutter the wrong way when we made the cut, which made it impossible to get the new fitting on. I re-cut with it facing the correct way, we tested it out, and voila! We have two shut-off valves. Hooray for shoddy work!

After cutting the next little piece of the cabinet we realized that with our existing Lazy Susan (no relation) corner cabinet, there is no way to access the inside of the cabinet in order to attach the countertop to the cabinet (they hadn't done this with the formica either - we found it was just sitting on top of it). This new conundrum resulted in several snarky debates between us so we decided to call it a day. We're off to the National Folk Festival again for the rest of the night - I'm gonna get me one of them there corn dogs and ponder the new challenges that await us tomorrow.  Perhaps, with luck, we'll have a sink back in by 2010.

The view from down here


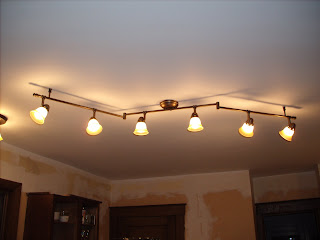
I just have one more screw! One more! I let Thom sleep in this morning and I have attempted to remove all of the screws holding in the old formica countertop myself. What this has entailed is a lot of lying on my back staring at the ceiling so I thought I'd share the view I've been looking at for the last hour: our new light and ceiling. I know I've shown these to you before but I was pleasantly surprised to see how nice it all looks from the floor. Much better than close up, anyway.

I'm waiting for some good ol' WD-40 to kick on the one last screw holding the countertop in - the brackets holding the sink in were much easier than this little bastard is. Grrr. Where are my woman muscles? Anyway, if all goes well (did I just jinx myself?) we'll have the new countertop on by tonight and I will update y'all on that too. Wish us luck - you know we need it.

Friday, August 22, 2008

Removing countertops


Who knows what wonderful surprises lurk under old work? Ah, yes, more surprises here in the Bangor Foursquare... Thom was concerned about how much time removing the countertops was going to take this weekend - he is worried that between removing the sink and putting in the new ones, we will run out of time. Moreover, it's the American Folk Festival this weekend here in Bangor and I know he wants to go down to that at least a few times.  So I thought I'd do a bit of a dry-run with the small piece of countertop that is by the side of the outside door. What I found was that actually removing it wasn't all that difficult but that getting to the two screws (yes, they only put in two) was what was the most challenging - strange angles and such. Anyway, after about 10 minutes I got it out to find this nice surprise. 


I'm assuming they did this to accommodate the adjacent door but it's just ridiculous. Why would you cut out the plaster (on both sides, mind you) and part of the door frame to put in a stupid formica countertop. How idiotic. So, drywall patching once again...sigh. At least we know it's easy to take them out, right?

Wednesday, August 20, 2008

Primer on cabinet boxes


Last night I primed the drawer fronts and this morning, instead of doing actual work, I put the first coat of primer on the cabinet boxes. This, to me, at least, seems to be the biggest difference I've seen in the kitchen. It seems much bigger now and certainly brighter - but that may be due to the fact that we have a million halogen lights now hanging in our kitchen (Thom has compared being in the kitchen to standing on the surface of the sun). We are looking into a dimmer but these seem relatively more complicated with 3-way switches. We'll see what we can figure out.

In the meantime, we went to pick up the cork flooring we ordered from HD. We had originally planned to get it from Lumber Liquidators but they stopped carrying the plain kind we wanted and after paying the ridiculous shipping charges from Ikea I was much more reticent to pay any more shipping. So we have it now and I'm excited that we now have all the pieces of our mini-reno in house. I don't know when it will actually all be put together but at least the stuff is all here now.

Monday, August 18, 2008

What a wonderful community

While Thom and I endlessly complain about our real neighbors and how noisy they are, I am so happy to have such a wonderful and supportive virtual community here online. How nice it was to see so many positive and motivating comments from my virtual neighbors. Thanks for the pep talks and the extrinsic motivation - I needed it!


Upon coming home from work today I checked on the doors and they certainly don't look as bad as I perceived yesterday. There are 6 of the 19 doors, however, that seem to have some weird cracking on them. They're not big spots but I'm still at a loss why it happened. It didn't do this with either coat of primer but stuck through both coats of paint. I am not sure what to do now or if I should just let it go. We'll see how it looks by the end of the week when we're ready to put the doors back on and they've cured a bit more.

Sunday, August 17, 2008

Last coat of paint is on cabinets


I just finished the second coat of paint on the kitchen cabinet doors. I'm a little concerned about a few things that have popped up today - a couple of the doors seem to have some cracking appearing that almost looks like a crackle type finish, something I was certainly not going for (and I have an inkling that these are the doors that were under the sink and had visible water damage after 30 years of being there, but I may be wrong) and some of the paint today on the back sides of the doors had an oozing kind of problem - hard to explain but it almost looked like the paint was overworked and dragged, even though I did not overwork the paint. I'm concerned we have some sort of weather issue since I'm doing it in the basement but who knows. I know they will in the end be fine and no one will probably see some of these things but it just niggling at me: another project that has turned out not quite right. 

I was talking to my best friend Tracy today (hi, Tracy!) and I mentioned that I think it's starting to not feel fun anymore - a sure sign, to me anyway, that I'm probably due for a break. I have had a great time doing all of this stuff until the Drywall Incident (yes, it's traumatic enough to have now risen to the level of proper noun) and some of the bloom has now left the rose. Eh, I don't know. Perhaps going back to school in a few weeks will be good even though I am slightly dreading it. Bleh. 

On another bleh note, Thom mentioned the other day that he saw some big cracks in our bedroom ceiling. I knew one was there as I had looked at it disdainfully on multiple occasions, but when I looked today I saw that the ceiling is now covered with hairline cracks that were never there before. I checked all the other rooms upstairs and one other room seems to have developed these as well, while the three other rooms are perfectly fine. It looks as though someone skim coated these cracks at some point, with them obviously popping back up now,  while the other three look to have a completely different texture, perhaps pointing to a re-plaster or perhaps it's drywall - it's tough to tell. I'm not sure if this is also weather-induced but we're going to have to figure out what to do. I seem to be doomed with ceiling problems.

Saturday, August 16, 2008

Killing time while the paint dries

It's Saturday and I'm in the home stretch of the cabinet painting. I just put on the first coat of the paint on the back sides of the doors, waiting for it to dry a bit before I flip it over and paint the fronts. I had worked with this paint before (Sherwin-Williams' ProClassic) when I repainted Thom's dresser and found it a bit hard to work with  - it is very tacky and you really can't work at all with it once you lay it down. That being said, I went all out buying a very expensive Purdy brush that was recommended to avoid brush strokes on the cabinets. We'll see how it looks after the second coat tomorrow but I'm not sure if any of this made any difference. It's supposed to be self-leveling paint, a type of alkyd but it's still looking a little brushy to me. I do like the color though and will be happy to see it in the kitchen.

In the meantime, just wasting some time. We're excited because we're finally going to see Sarah & Ken's house tomorrow for brunch - they are our blog and home improvement inspirations (I definitely recommend reading their blog if you  haven't already done so). When we get home, we're also going to sneak in to the home next door, which is for sale and is having an open house. We heard they bought it as a flip, a while before we bought ours, and we're excited to see what it looks like.

Otherwise, just plotting the next steps in the mini-reno in the kitchen. The plan is to prime and paint the cabinet boxes this week after detaching the old countertops and to install our new, beautiful Pronomen Ikea countertops next weekend along with our new sink faucet. After that, we'll have to do some patching of the backsplash area and then we can paint the wainscoting, woodwork, and walls probably the weekend after. The new cork floor is supposed to be in soon and so that will get put down last. I'm not sure when we'll get to putting the tile backsplash on (I'm rooting for mini slate tiles) but that may have to wait until a weekend after school starts. So, we're trucking. 

Thursday, August 14, 2008

Priming cabinet doors


My back is killing me but I just finished priming the kitchen cabinet doors (as per the This Old House Magazine insert from August's issue). I was lucky enough to find that we have clothesline down in our basement on which I could hang them to cure completely since TOH suggests using cup hooks to hang them to dry between steps. In a couple hours I will venture back down to sand the first coat and then I have a feeling I'm going to have to do a second or even third coat of primer to get it perfectly smooth. So far, then, these are the steps I have followed:

1) Remove doors, labeling inside boxes and doors and removing hinges and numbering accordingly.
2) Use TSP substitute (wear those gloves and eye protection!) and wipe down to remove three decades of grime and grease. Let sit for 3-5 minutes and wipe down with clean cloth.
3) Fill holes with wood filler, let dry, and sand off excess with 100-grit paper.
4) Sand all surfaces with 100-grit paper to "rough up" the surface of the cabinets and the boxes (at this point, I also used a tack cloth to remove the dust).
5) Drill holes and screw in cup hooks on tops of upper cabinet doors and on the bottom of lower cabinet doors.
6) Prime one side with sandable primer (I am using Sherwin-Williams' Prep Rite Classic as it will go well with their ProClassic paint later - no skimping on paint or cheap brushes), let dry to the touch, flip over, and prime the other side.
7) Once dry to the touch, hang doors to dry completely.

Step 8 will be later today, then, sanding with orbital sander and 220-grit paper to smooth out brush marks.

So, that's that. I hope this turns out well. Thom is worried the kitchen will be too bright with white cabinets (well, they're technically going to be Sherwin-Williams' Alabaster, a bit more cream than just plain white) and the halogen lights we just installed but we'll see. It may be that we install a darker tile backsplash to balance it all out. 

Wednesday, August 13, 2008

Cat/kitchen mystery solved


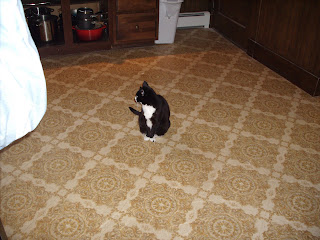
I am taking a break from sanding the cabinet doors (my back is killing me) and decided to update all of you on a deeply pondered mystery here at the Bangor Foursquare: Why does the cat avoid the kitchen? I had wondered if it was because of the nasty vinyl flooring giving her vertigo or the fluorescent lights. She has been hanging out in the kitchen considerably more since we removed the fluorescent boxes a month ago and, as you can see, the floor remains. This case is closed. 

On a related but altogether different note, we now have to figure out why she hates having her picture taken. She does everything she can to avoid looking at the camera, leaving us with hundreds of great pictures of her behind and her side but rarely of her face. Having her for 11 years now, that translates into a lot of butt shots of our cat.

We almost killed each other but the lights are up


This was another project that I had assumed would be easier than it actually ended up being. I should probably sense a theme here but I'm not that bright. The three lights in the kitchen are now finally up. I suppose that the difficulty came with the awkwardness of putting up the middle light, trying to have one person hold it up (it's long and unwieldy, you can see) while the other made the connections. We also have a mess of wires in that middle box, as it is a three-way light, plus it has the main power and a line coming from the pendant on the other side of the room. Taken all together, it was a bitch to put up and figure out. Anyway, Thom learned all about electricity and those tricky 3-ways and got it all wired correctly. A toast all around for Thom, who is the Super Electrician, albeit begrudgingly so.

I'm off to start sanding and priming the cabinets. I'd like to have them all done by the end of the weekend but am trying to curb my overzealousness as it has not served me well up to this point. My husband asks, "What's the rush?" I respond, school starts in three weeks and who knows the madness that awaits me there. Moreover, this was my one summer goal (instead of a vacation or real actual fun) and I'd like to have it accomplished.  So, dammit, I want to get it done.

Tuesday, August 12, 2008

Old kitchen cabinets and new drawer slides?

Now that we're almost done with the ceiling portion of the program, it's time to move on to the cabinets. I removed all of the cabinet doors (which were disgustingly dirty, by the way) and am going to follow This Old House Magazine's trusty insert on refinishing kitchen cabinets, starting with using a TSP substitute to get all the nasty grime off of them.

As I was doing that (and after visiting my friend Ginger's house this past weekend), I dreamed of getting those awesome self-closing drawer slides on the drawers. Unclosed doors and drawers are a leading cause of distress in my marriage and I think not only would these be cool but they would save me from that feeling of disillusionment every time I have to close a kitchen drawer. I'm just trying to figure out from where I could get these and how to retrofit them. I found a bunch on the Internet but am admittedly overwhelmed by the many kinds, many different prices, and the whole thing altogether. Anyone done this? Tips? Good buys? 

Monday, August 11, 2008

Lights, camera, pass out


I have returned from my brief hiatus. Thom and I attempted to put up the three lights in the kitchen (while blinding our eyes to the less than perfect ceiling). We got up one okay and then started on the big one in the center - we realized we had several problems with which to contend, namely that the screws that hold the fixture to the brace were too short (i.e., I placed the junction box up too high) and that there are just too many wires, wire nuts, etc. to fit back under the fixture plate. We got some new screws but have not yet figured out the spacing issue. We're both a little wiped out so we're going to attempt the big one tomorrow but we got the other small one up above the sink. So, two done, one big one to go.

My hope is to start sanding the cabinets tomorrow. Our countertop from Ikea also arrives tomorrow afternoon but that will be a while. I was happy to see it live and in person at the showroom in Stoughton this past weekend and it looks beautiful. I can't wait to see it all put together.

Saturday, August 9, 2008

On location: Stoughton, MA

I have escaped my DIY nightmare for a few days, coming down to visit one of my best friends from high school, Ginger, and her husband Pete. They just recently purchased an old Victorian and are working their way through renovating and renewing. Admittedly much more work than ours is (and about 25 years older), their house is just amazing. With the beautiful molding, gorgeous stained glass, and amazing trimwork, the house is a jewel.

Pete and Ginger have worked on about four houses now and this one is by far the biggest but since they moved in early spring, they've already had the entire house rewired, replumbed, and have just about completed the entire kitchen, added a laundry room, built a back porch, and have now skim coated and painted three other rooms. I can't wait to see how it all transforms after their hard work. It's like being in a candy store for me - I can hardly keep my paws to myself, wanting to start stripping wallpaper (ooh, they have amazing specimens here) and helping to strip the paint off the beautiful corbels in the front of the house. I'm trying to get them to start a blog to chronicle their hard work and join the community of housebloggers. I can imagine many of you equally swooning over the details of this amazing house. I'll try to score a few photos so you can see what I'm talking about.

Thursday, August 7, 2008

Grrr. Argh.


I was wrong. I admit it. I thought that putting drywall up was difficult. No, that's a cake walk compared to taping and mudding it correctly. The most frustrating thing about this whole process has been that just when you think you're done and it looks good, a bubble appears (or twelve). I worked last night on cutting them out and filling the gaps. I finally primed today only to find a million more that popped up that were never there before. Even more frustrating about this process is the fact that you think you have everything smooth and nice and then you prime it and see that it's not all that smooth after all. I'm sure there's some easy and sane way to figure this out before you prime but I obviously do not know what it is.

A while ago I was reading several other housebloggers' sites who talked about hiring out. One even mentioned that they were sure other DIYers would scoff at them for doing so. In fact, I admittedly did scoff a bit. Now that it's all said and done, though, I would hire someone else to do this - well, maybe just the taping. It's certainly an art with which I have not been gifted and knowing my Type A personality, it will probably continue to bother me every single day I live in this house. I can just see it: walking through the kitchen and having my eyes immediately drawn to the bubbled areas on the ceiling. How annoying. The funny thing is that I have come to appreciate the bumpy nature of our old plaster and have left it "natural" instead of skimcoating the walls after I removed the wallpaper. I find nothing appealing about poorly done drywall, however. To me it just reaks of inaccuracy and ineptitude. Oh, blah. I need a vacation.

Wednesday, August 6, 2008

Going slowly insane

I think I'm going crazy. I just finished typing the last post, feeling free and easy, thinking I was finally done (for the second night, you'll notice) and I go into the kitchen for a snack and suddenly see lots of little bubbles under the drywall tape where there had never been any before. WTF?!?! It looked like everything was fine and suddenly these things are everywhere. I had a couple yesterday and I slit them open with a razor and put some more mud under them this morning. Those seem to be fine but now there are a bunch more. I am so frustrated!

Ready to prime

Okay, I'm really done now. I spent a few hours this morning trying to tidy up the ceiling seams and get it ready for priming tomorrow. It's not perfect, by any means, but I think it's "as good as I can get it." That's my mantra, anyway. This was our first drywalling experience and it wasn't easy, that's for sure, but we certainly learned a lot. Here's how I would sum up our lessons learned:

1) Rent a drywall lift. You may think, "Oh, we can do it. How heavy can 14-foot sheets of drywall really be?" Believe me, they're heavy. And, your friends will thank you for not taking advantage of them.
2) Have a comfortable ladder. You're standing up there a lot of the time and it's a good thing.
3) If it's your first time, practice mudding on a spare piece of drywall or on a wall first. I noticed it took me quite a while to get used to the intricacies of holding and feathering with the knives, especially as they got progressively bigger.
4) Definitely use three different sizes of knives. I thought this seemed excessive in all the instruction booklets but I totally get it now.
5) Take frequent breaks. Your neck and back will thank you.
6) Use a drywall sponge after the last coat instead of sanding. It works really well.
7) If you have money, hire someone else to do it (just kidding...but maybe not).

Tuesday, August 5, 2008

I'm going to wash that mud right out of my hair

Yes, I have mud in my hair. Drywall mud, that is. I'm glad to say, however, that the millions of hair washes have been worth it - the mudding is now all complete in the kitchen. Phew! Honestly it was much more work than I thought it would be, and I'm still admittedly nervous about what the finished product with paint looks like, but I'm glad we attempted to do it. I actually enjoyed mudding and taping more than I thought I would. I think after trying to patch holes it didn't seem all that much fun but that was mostly due to the fact that I was constantly getting dust and dirt from the broken plaster in the mud and it was a pain in the rear section.

Anyway, I'll sponge tomorrow and hopefully will be able to prime the ceiling on Thursday! Woot, woot! Here are a few befores and afters for you photo-philes.

Before (and after taking down the drop ceiling)

After!

Before (what we found under the lovely soffits)

After!


Post Script - Paul came by to check on our progress this evening and my previous joy was a bit premature and unmerited. He thinks we have some issues to take care of (a bit of bubbling and a few screws), which means I'm not yet done. Boo hoo!

Monday, August 4, 2008

Hydrangeas - hallelujah! Cracking in joint compound - drats!


I have pretty much spent the past four months asking anyone who might know why my hydrangeas have looked so awful. I am happy to finally report that they are blooming! Hooray! Blooms! I am now concerned, however, that they are doing so very late in the season but I will take what I can get. I am just glad they are not dead. Nevertheless, I have learned my lesson about buying anything other than annuals at Lowe's or Home Depot.

On another note, after I sang my praises yesterday about my mudding dexterity, I woke to find a hairline crack on the second coat of a seam on the ceiling (difficult to see above but it is there). We really struggled with this seam - the distance between the two sheets was more than the typical 1/4-1/2 inch. We knew it would be a problem but we had to re-do it twice and now this happened. Sigh. I hope the third coat will repair the damage but I'm concerned. I did get all the rest of the corners taped and mudded this morning and will start final coat on the ceiling tomorrow and then will do second and third coats on the patches and corners tomorrow and Wednesday. Painted ceiling, here we come!

Sunday, August 3, 2008

I'm getting pretty not so bad at this

I got the second coat of mud on the ceiling today as well as doing two of the four joints at the ceiling. While I'm certainly not an expert I can definitely feel a little more dexterity with the taping knife and trowel. It's going on a lot smoother and I'm starting to get a little more hang of the intricacies of the knife angle to smooth and feather the mud over the joints. My plan is to finish the two other ceiling-wall joints tomorrow and get the third coat on the ceiling so we can get the ceiling painted by Tuesday or Wednesday. Then we'll see about the next big thing: rigging up the lights. I know it wasn't tough taking down the old ones so hopefully putting up new ones will be equally easy.

Saturday, August 2, 2008

Our cat's adhesive fetish


Just because this happened while I was typing the last entry, I thought I would share. Mancha, our feline companion, has had a long standing obsession with adhesives. In particular, she seeks out and fiendishly gnaws upon things like Post-It notes, tape, and, her absolute favorite, lint roller sheets. While I was typing, she grabbed a Post-It off of Thom's notebook and ran up the stairs with it while Thom pursued her. It was pretty darn funny...maybe you'd have to see it in person but it was hilarious.

Spending money and taping the ceiling

That's what we've been doing the past few two days - spending money and taping the ceiling. We put the tape and first coat up on the ceiling and covered the nails and spent inordinate amounts of money (well, it was actually quite premeditated and budgeted but it felt scary) on things like a new cork floor, a new stove hood, a countertop, and paint. We're still debating about the backsplash so that may come quite a bit later. I think the only other things we need to take care of/pay for will be the hardware for the cabinets and getting the plumber to come and run a water line up to the fridge we bought back in February so we can have ice and water in the door - I'm honestly really excited about that.

So, Thom and I are getting pretty good at taping and mudding. We've definitely learned our lessons - and, if we ever do this again (per chance, in the attic at some point) we will know to do things differently but c'est la vie - right? As Alanis would say, "You live, you learn."

Friday, August 1, 2008

Help! Joint compound gone wrong

I admit it. I don't really know what I'm doing. I'm trying to repair some fairly large holes in our plaster in the kitchen. When I did it upstairs under the window, it worked fine to just use some drywall tape and joint compound and it painted up nicely. These holes, however, are a big wider/longer and when I tape over them, I'm having to use several pieces of tape to cover the hole. When I mudded over them last night the finished product today looks like this:

I'm at a loss as to what to do now. Do I try to scrape this all off and start over? Do I just retape over it and start again? I know that this patching job isn't the absolutely correct way but the holes are all above the cabinets so they're not anywhere that anyone will be able to see closely or well. Any ideas, House Gurus?